Crack Me 3 - Reverse Engineering Challenge
The challenge involved reverse-engineering a compiled 64-bit ELF PIE executable to extract an encoded flag hidden in memory.
To solve this challenge, I leveraged static analysis (using Ghidra), dynamic debugging (using GDB) and Python automation to extract the flag. This write-up explains the step-by-step approach used to analyze the binary, understand its flag verification mechanism and automate the extraction process.
Understanding the Challenge
The challenge provides me with an executable binary named challenge. To gather initial information, I inspect the binary using the file command:

This output tells us that the binary is a 64-bit ELF executable with position-independent execution (PIE) enabled. It is dynamically linked and does not contain debugging symbols, making static analysis more challenging.
When I execute the binary, it prompts for a flag:

This indicates that the program is expecting a specific input, and the goal is to determine the correct flag.
Decompiling the Binary
To understand the logic behind flag verification, I used Ghidra to decompile the binary and analyze its main function:
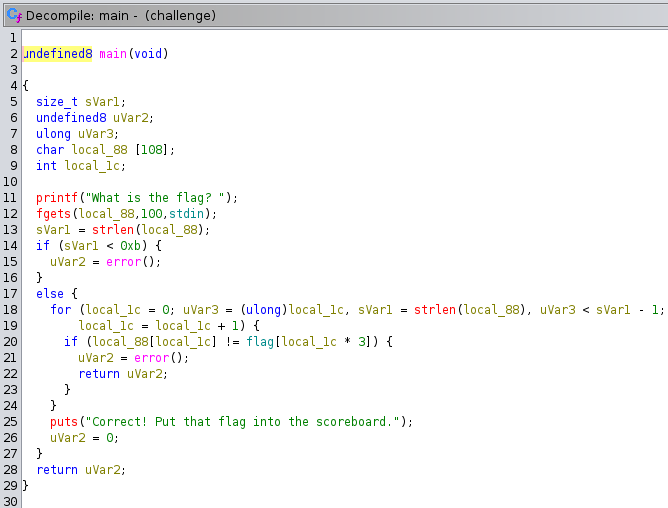
From this decompilation, I note the following key points:
· The program reads user input (up to 100 bytes) into a buffer.
· It requires the input string to be at least 11 characters long.
· Instead of a direct string comparison, the program compares each input character with the first byte of every three-byte group in an encoded flag array. This implies that the flag is stored as 40 groups of 3 bytes (a total of 120 bytes) and only the first byte of each group forms the valid flag.
As the flag variable is not directly visible in the binary, I used dynamic analysis to extract its value.
Extracting the Flag Using GDB
Since flag is stored in memory, I use GDB to locate and extract it. I start by setting a breakpoint at main and running the program
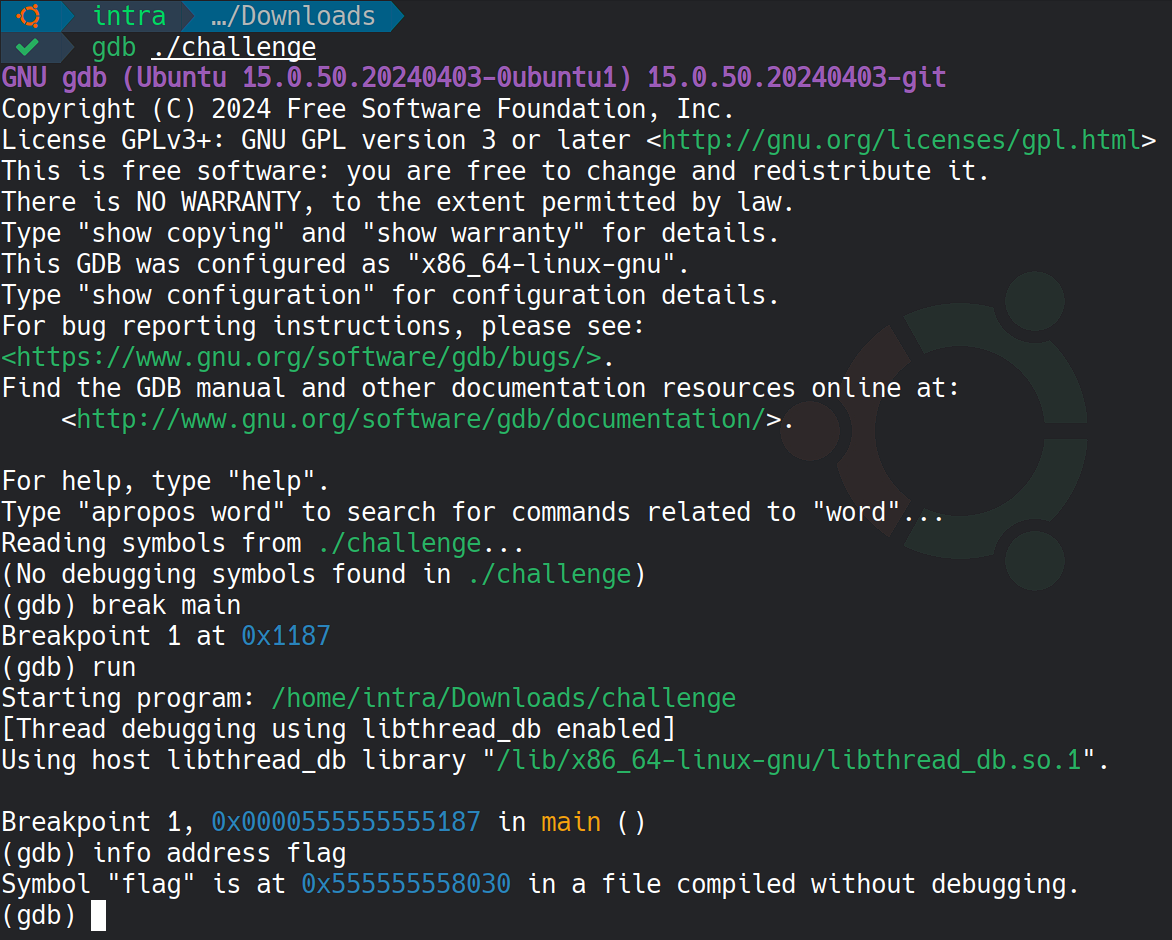
This reveals that the encoded flag is not at the flag symbol address but is located at an offset. By subtracting 0x2028 from the flag symbol address, we can determine the memory address of the encoded flag data. We then inspect 120 bytes of memory from that address.
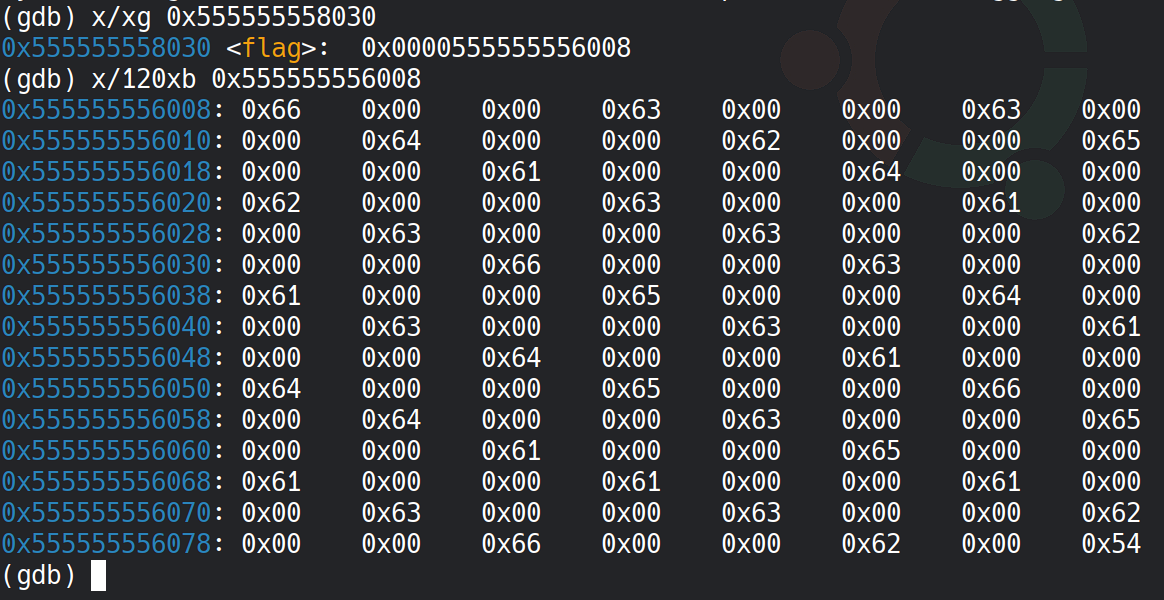
The memory dump reveals the flag, encoded as 40 groups of 3 bytes, each containing a valid ASCII character where the first byte of each group forms the flag. Extracting these bytes manually would be tedious, so I automate the process with a Python script.
Automating Flag Extraction
To streamline the extraction process I developed a Python script that runs inside GDB.
import gdb, re

def extract_flag():
    # Get flag's memory address
    out = gdb.execute("info address flag", to_string=True)
    addr = int(re.search(r"(0x[0-9a-fA-F]+)", out).group(1), 16)
    encoded_addr = addr - 0x2028

    # Read encoded flag from memory
    data = bytes(gdb.selected_inferior().read_memory(encoded_addr, 120))

    # Extract every third byte
    flag = "".join(chr(data[i]) for i in range(0, len(data), 3))
    gdb.write("Flag: {}\n".format(flag))

# Set breakpoint at main and extract flag
breakpoint = gdb.Breakpoint("main")
gdb.execute("run")
extract_flag()
This script:
· Runs the command info address flag to get the flag symbol's address.
· Computes the encoded flag’s memory address by subtracting an offset (0x2028).
· Reads 120 bytes of memory and decodes the flag by taking the first byte from every 3 byte group.
· Automatically displays the flag when the program hits the main function.
We can now execute the script to extract the flag.
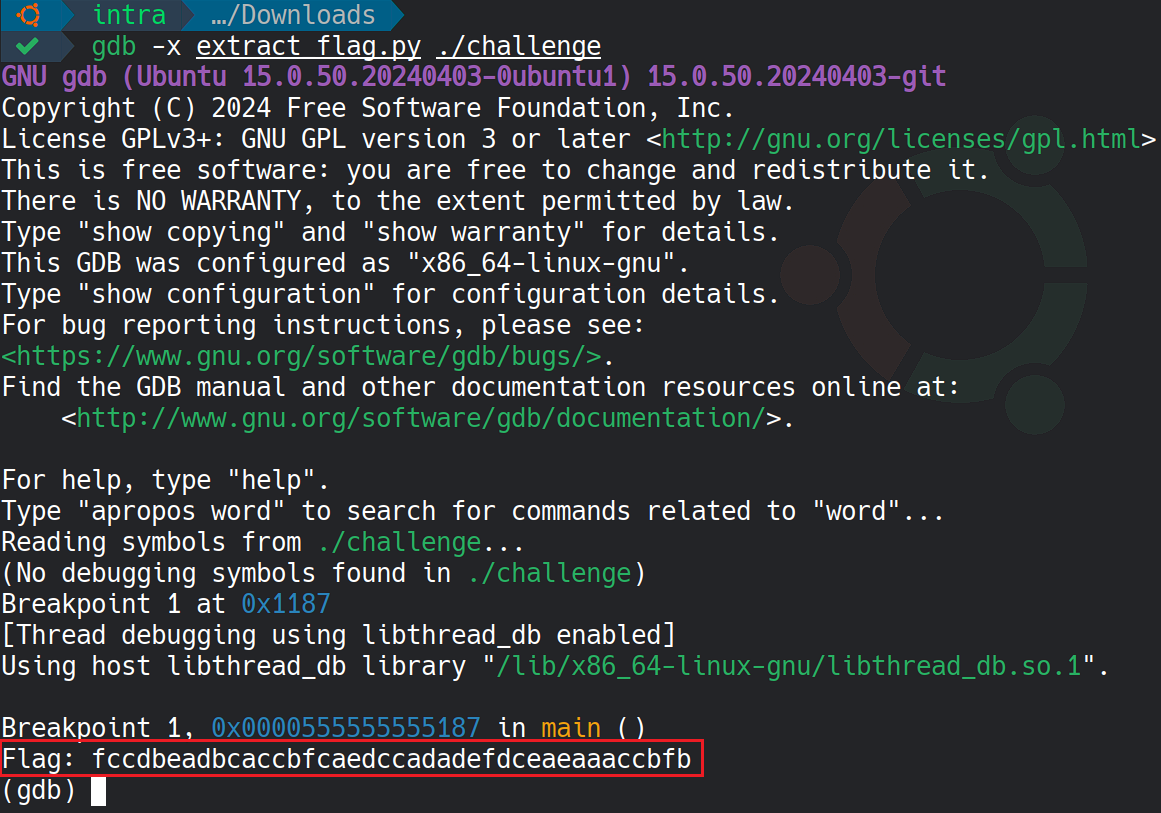
The script successfully automates the flag extraction process by dynamically identifying the correct memory location and decoding the flag (fccdbeadbcaccbfcaedccadadefdceaeaaaccbfb).

This extracted flag is the correct input for the challenge.